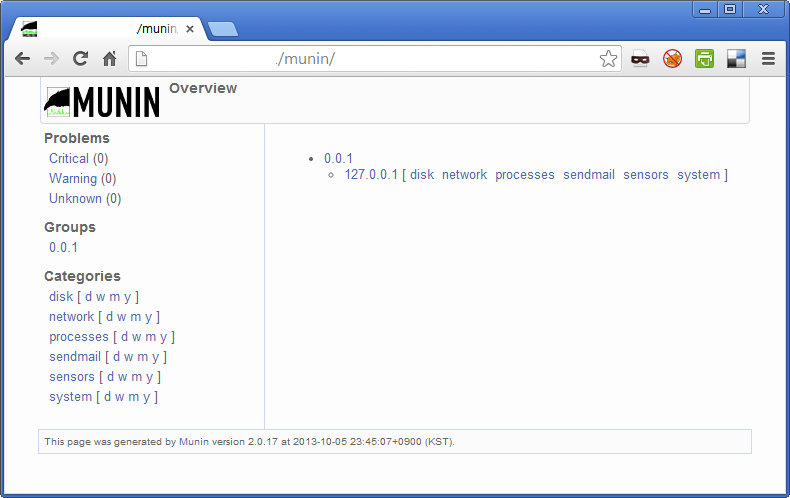
서버를 모니터링 해야 할 일이 생겨 좋은 도구를 찾다가 발견했다.
MUNIN ( http://munin-monitoring.org/ )
설치를 해보자..
]# yum -y install munin munin-node
Loaded plugins: fastestmirror, security
Loading mirror speeds from cached hostfile
 * base: centos.tt.co.kr
 * extras: centos.tt.co.kr
 * updates: centos.tt.co.kr
Setting up Install Process
No package munin available.
No package munin-node available.
Nothing to do
]#
yum으로 설치할랬더니.. 위와 같이 못찾는 단다..ㅡㅡ;;
검색을 좀 해보니.. EPEL repository를 설치해야 한단다..
EPEL 이란 Extra Packages of Enterprise Linux 를 뜻하며 말 그대로 엔터프라이즈 리눅스의 추가 패키지 저장소다.
]# rpm -Uvh http://dl.fedoraproject.org/pub/epel/5/i386/epel-release-5-4.noarch.rpm
http://dl.fedoraproject.org/pub/epel/5/i386/epel-release-5-4.noarch.rpm(을)를 복구합니다
경고: /var/tmp/rpm-xfer.VJD3MB: Header V3 DSA signature: NOKEY, key ID 217521f6
준비 중...               ########################################### [100%]
   1:epel-release           ########################################### [100%]
]#
자 그럼 다시 설치~
]# yum -y install munin munin-node
Loaded plugins: fastestmirror, priorities, security
Loading mirror speeds from cached hostfile
 * base: centos.tt.co.kr
 * epel: ftp.kddilabs.jp
 * extras: centos.tt.co.kr
 * updates: centos.tt.co.kr
epel                                                                                                               | 3.6 kB     00:00
epel/primary_db                                                                                                    | 3.8 MB     00:01
271 packages excluded due to repository priority protections
Setting up Install Process
Resolving Dependencies
--> Running transaction check
---> Package munin-node.noarch 0:2.0.17-1.el5 set to be updated
--> Processing Dependency: munin-common = 2.0.17 for package: munin-node
.....(생략).....
Complete!
]#
그럼 이제 설정을 해보자..
다수의 서버를 모니터링 할경우는 모니터링 서버와 모니터링 대상서버를 나눠서 설정하면 된다.
하지만 나의 경우 그냥 한 대의 서버를 모니터링하는게 목적이라.. 서버와 대상서버를 나누지 않고 한대서 설정했다..
먼저 서버 설정..
두가지를 설정해줘야 한다.
munin.conf 와 모니터링 웹을 위한 apache 설정…
먼저 munin.conf 에는 모니터링 웹을 위한 html docroot 를 설정하는 것과 모니터링 서버의 hostname 설정.
]# vi /etc/munin/munin.conf
...
  8 #dbdir  /var/lib/munin
  9 htmldir /home/www/munin
 10 #htmldir /var/www/html/munin
 11 #logdir /var/log/munin
 12 #rundir  /var/run/munin
...
 98 # a simple host tree
 99 [127.0.0.1]
100     address 127.0.0.1
101     use_node_name yes
...
그리고 apache 웹서버에 아래와 같이 설정한다.
]# vi httpd.conf
...
170 #munin.conf htmldir 경로를 적어준다.
171 Alias /munin "/home/www/munin"
172 <Directory "/home/www/munin">
173      Options -Indexes FollowSymLinks
174      AllowOverride All
175      Allow from all
176
177      Order Deny,Allow
178      php_value short_open_tag off
179 </Directory>
...
그리고 apache 서버를 구동한다.
아직 접속해도 데이터가 없으므로 정상적으로 접속은 안된다..
이제는 모니터링 대상서버를 설정해보자
]# vi /etc/munin/munin-node.conf
...
 34 # Set this if the client doesn't report the correct hostname when
 35 # telnetting to localhost, port 4949
 36 #
 37 #host_name localhost.localdomain
 38 host_name 127.0.0.1
...
여기서는 모니터링 서버와 모니터링 대상서버가 같아서 같은 이름을 줬다..(더 헷갈리나?)
자 이제 munin-node 서비스를 시작해보자..
]# service munin-node start
Starting Munin Node:                                       [  OK  ]
아래와 같이 로그가 생기면 정상적으로 동작하고 있는 것이다..
모니터링 대상노드의 로그
]# tail -f /var/log/munin-node/munin-node.log
2013/10/05-23:40:01 CONNECT TCP Peer: "127.0.0.1:46398" Local: "127.0.0.1:4949"
2013/10/05-23:45:02 CONNECT TCP Peer: "127.0.0.1:36250" Local: "127.0.0.1:4949"
모니터링 서버쪽 업데이트 로그
]# tail -f /var/log/munin/munin-update.log
2013/10/05 23:55:01 [INFO]: Starting munin-update
2013/10/05 23:55:01 [INFO] starting work in 8111 for 127.0.0.1/127.0.0.1:4949.
2013/10/05 23:55:07 [INFO]: Munin-update finished for node 0.0.1;127.0.0.1 (5.14 sec)
2013/10/05 23:55:07 [INFO] Reaping Munin::Master::UpdateWorker<0.0.1;127.0.0.1>.  Exit value/signal: 0/0
2013/10/05 23:55:07 [INFO]: Munin-update finished (5.20 sec)
이제 http://domain/munin 에 접속해보자~

그런데 비밀번호 없이 바로 접속된다..
인가된 사용자만 접속하기 위해 비밀번호를 생성해보자..
먼저 htmldir 위치에 .htaccess 을 아래와 같이 생성한다.
]# cat /home/www/munin/.htaccess
AuthType Basic
AuthName "Members Only"
AuthUserFile /home/www/munin/.mypasswd
<limit GET PUT POST>
require valid-user
</limit>
그리고 password 를 설정한다.
]# htpasswd -c /home/www/munin/.mypasswd user
New password:
Re-type new password:
Adding password for user user
다시 접속해보면 인증창이 뜨는것을 볼 수 있다..
그럼 즐거운 모니터링을~
참고 : http://coffeenix.net/bbs/viewtopic.php?p=6094
